
Skimp includes a nifty tool for easily replacing the textures of your model’s materials.
Have you ever imported an FBX, OBJ, or some other file format into SketchUp only to find that all of the textures are missing?
This can be due to a number of reasons:
- Texture files are completely missing
- Referenced texture files were renamed
- Texture files were placed in an unexpected location
- The OBJ MTL file does not include any texture references
- Textures files are in a file format that SketchUp does not support
Textures are missing after import
Fortunately, Skimp can solve this problem easily with the Replace Textures Tool:
- CTRL + Click on a face that has the texture you wish to replace
- Select the new texture
- Skimp will replace the original texture with the new one
Apply the missing textures in seconds
Texture Position is Maintained
Here’s the best part: Skimp will preserve the texture position (UVs) when you replace it!
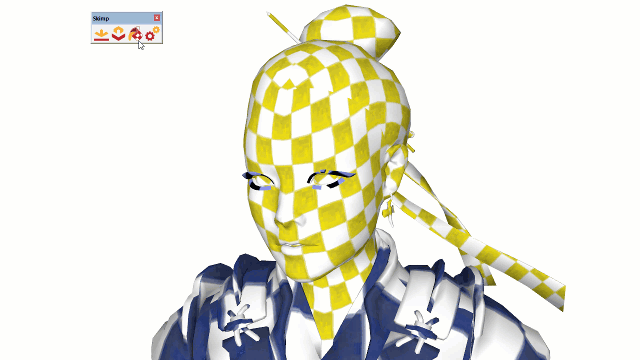
Skimp has the option to automatically apply a temporary checkered UV texture when importing a file. That way, even if the textures are missing, you won’t lose the position.
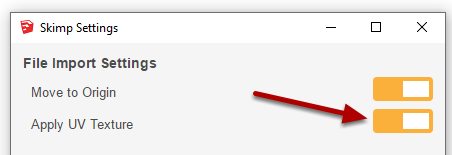
Open the Skimp Settings and apply a UV Texture when importing
Replace Materials
The Replace Textures tool has another extremely powerful feature.
By SHIFT + Clicking, you can completely replace a material of all matching faces without changing the UVs! This tool has many uses and is great for reducing the amount of duplicate materials in your SketchUp model.
Check out the video below to see the tool in action!
Check out the tutorial video above
Skimp gives you the tools you need to quickly import multiple file formats into SketchUp and simplify your model. To learn more, see our step-by-step guide of the Replace Textures Tool.